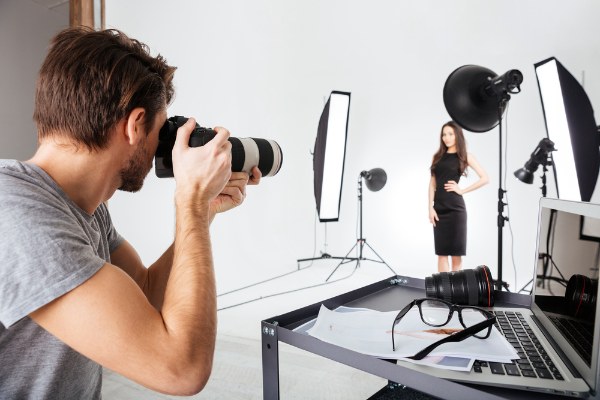
In case you have purchased yourself a DSLR and, right after unpacking this from the package, you are afraid of the number of dials and buttons, and the thickness of the guide, it may be attractive to put this manual down, now flick this onto the “Auto” and then start shooting.
While that is good for a few, this might not be lengthy till you desire the innovative control which influenced you to buy a DSLR first of all, however, where will you start?
In case you contemplate yourself a newbie who else is uncertain of steps to make the majority of the camera, then this article is made for you. It is meant to be a short, a 1-stop store to assist you to take the camera off auto, and also seize the control of the DSLR.
This is not meant to be an alternative for the camera guide, therefore will never clarify each and every final setting in too depth, however, will include sufficient of the fundamentals to get the control of the camera, and also give you the crucial topics to look back to your guide to read.
Tips For Learning Exactly How To Use The Digital Camera:
-
Master The Shooting Mode:
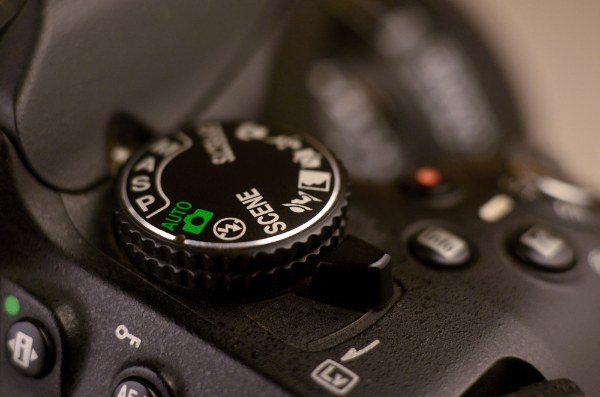
The best place for starting is with the shooting mode. The shooting mode will likely be available on the dial labeled with ‘M, P, Tv, Av, auto’ and perhaps much more.
Choosing the shooting mode certainly will figure out how the camera acts whenever you push the shutter like when the “auto” is chosen, your camera will certainly figure out anything to perform with the exposure, such as the shutter speed and aperture.
-
Understand The ISO:
The ISO is a way of measuring exactly how delicate the particular sensor of the camera tends to be to light. The phrase started in the film photography, wherever film of various sensitivities might be utilized based on the conditions of shooting, and also this is absolutely not different in the digital photography.
ISO sensitivity actually is symbolized numerically from the ISO 100 (lower sensitivity) to the ISO 6400 (higher sensitivity) and more than that, and also handles the quantity of light needed through the sensor to attain a specific exposure.
-
Understand “Exposure Triangle”:
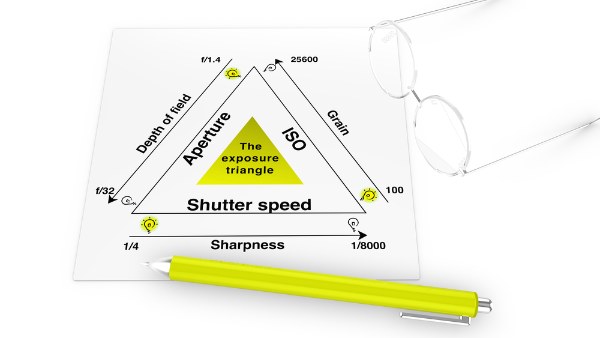
It is vital that you remember that ISO, shutter speed, and aperture are almost all are the portion of the exposure triangle.
Also, they almost all manage either the quantity of light getting into the camera (shutter speed, aperture) or even the quantity of light needed by your ISO (camera) for specific exposure.
-
Learn Metering:
Throughout all the discussion discussed above, I said that camera measures the exposure based on the quantity of accessible light, however, what exactly is this doing actually?
Whenever you take a photograph, use a form of automated exposure calculation (for example auto-ISO, shutter priority setting or mode, aperture priority setting or mode, and so on) the camera usually attempts to determine the “average” exposure.
-
Understand Focusing:
Irrespective of exactly what capturing mode you use, or even exactly what ISO you determine, the possibilities are that you will see a subject of the picture which you prefer to get in focus.
In case that that particular focus is not accomplished, the picture will never be exactly what you desired.
-
Know The File Types And Size:
You may have the choice to be in a position to change the dimension of the pictures which the camera will record, and also by which type of file.
You would like to set the file size to the biggest possible (regardless of whether this is ‘super fine,’ ‘fine’ or ‘large’) to make sure that you are creating the majority of the mega pixels which you have spent in.
-
Understand The White Balance:
In case capturing in jpeg, what I suggested in this post, you will have to ensure that you set the white balance prior to taking a shot. White balance may considerably impact the color tone of the photographs.
You might have realized that occasionally your pictures have the “blueish tone” for them and, in some other, everything appears quite orange. It is to perform with “white balance” and also, while you may make a few adjustments to the picture on the computer, this is easier in case you have this right correct in advance.
More Technological Scoop: Charging Your Gadgets With An All Purpose Laer Laptop Sleeve
-
Conclusion:
Therefore that is the summary of the configurations you will certainly experience whenever you prefer to make the jump and take the camera off “Auto.” Also, you do not always have to think about them all immediately, however discovering and also knowing the impact of every setting eventually will get you in the full control of the camera.
Not to mention, the major step which will provide you the majority of obvious distinction in the feel of control and immediate impact on the innovative outcomes, will certainly be to begin utilizing the “shutter priority” or “aperture priority” shooting settings and also as soon as you are acquainted with all those, you will begin to think to discover more.
In no time, you will not think of the camera as the mystical black box, however, realize how to accomplish the photographic outcomes which you ordered first of all.


